


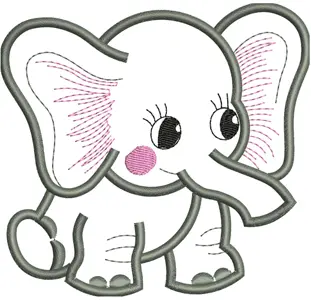

Baby clothes just look sweeter with a little animal stitched on. Elephants happen to be a top pick, honestly. They come off soft, gentle, and cute on almost any fabric you pick.
Want to add one to a onesie or blanket? You’ll need Elephant Machine Embroidery Designs made specifically for baby fabric. These designs use lighter stitching, so things stay soft and safe for delicate clothes. Let’s walk through doing it the right way.
Why Elephants Are Such a Hit for Baby Designs
Elephants have that soft, round shape, and it works beautifully in embroidery. They also carry sweet meaning across plenty of cultures, often tied to luck and family love.
That’s basically why elephants show up on baby blankets, bibs, and onesies constantly. Simple, cute, and easy to pair with soft baby colors, all around.
What You Need Before Diving In
Getting set up first makes the whole thing go smoother. Here’s what you’ll want on hand.
Machine And Software
You’ll need an embroidery machine that reads your design file properly. Most machines handle common formats like DST or PES.
Baby-Safe Thread
Grab soft, high-quality thread built for sensitive fabric. Rayon and polyester threads tend to work great for baby items.
Stabilizer
Stabilizer holds the fabric steady while you stitch. For baby clothes, stick with a lightweight, soft stabilizer. Shouldn’t feel stiff once you’re done.
Fabric Choice
Baby clothing runs thin and soft, usually. Cotton and jersey knit are popular picks. These fabrics need gentle handling while stitching.
Picking The Right Elephant Design
Not every embroidery design suits baby clothes well, not even close. Some run too dense. Some pack in way too many stitches for soft fabric.
Look For Light Stitch Density
A solid baby design uses fewer stitches overall. Keeps the fabric soft and flexible once stitching wraps up.
Check The Design Size
Small designs work best on baby items, hands down. Something around two to three inches wide fits nicely on most onesies and bibs.
Simple Shapes Stitch Out Cleaner
Simple elephant shapes with clean lines just look better. Designs crammed with tiny details tend to look messy on soft fabric.
Step-By-Step: How To Stitch the Design
Here’s a simple guide to get you rolling.
Step 1: Prepare Your Fabric
Iron the fabric first, always. These clear wrinkles that mess with your stitching. Smooth fabric leads to cleaner results, every time.
Step 2: Hoop The Fabric Correctly
Slide your stabilizer under the fabric. Hoop both together, keeping things snug, not stretched too far.
Avoid Over-Stretching
Baby fabric stretches easily, way too easily sometimes. Pull it too tight in the hoop, and puckering shows up once you’re done.
Step 3: Load The Design File
Send your elephant design file over to your machine. Double check size and placement before you actually start.
Step 4: Test Stitch First
Always run a test stitch on scrap fabric that matches. Catches problems early, before you touch the real item.
Step 5: Start Stitching
Once that test looks solid, fire up your machine on the real fabric. Watch the first few stitches closely, catch issues fast.
Step 6: Remove The Stabilizer
Once stitching wraps, gently peel the stabilizer off the back. Trim close to the stitches, and don’t tug at the fabric.
Tips For Better Results
A few small habits genuinely change the final look.
- Grab a smaller needle for thin baby fabric.
- Slow your machine speed down for delicate items.
- Always test on scrap fabric before touching the real one.
- Pick thread colors that match soft baby tones.
Common Mistakes to Avoid
Even careful stitchers slip up sometimes, it happens. Here’s what to keep an eye on.
- Using stabilizer that’s way too heavy for the fabric.
- Skipping the test stitch just to save time.
- Picking a design with too much stitch density.
- Hooping the fabric too tight, or way too loose.
Honestly, I’ve seen plenty of baby projects get ruined by skipping that test stitch. That one small step saves so much trouble later.
Caring For Embroidered Baby Clothes
Once your elephant design’s stitched, good care keeps it looking sharp.
Washing Tips
Wash embroidered baby clothes in cold water, always. Protects the stitches, and keeps colors from fading too fast.
Drying Tips
Air drying treats the fabric gentler than a machine dryer. If a dryer’s your only option, stick to low heat.
Ironing Around Stitches
Need to iron the item? Skip ironing right over the stitched area. Iron around it instead, or use a cloth for protection.
Why Good Stitching Actually Matters for Baby Items
Baby skin is sensitive, really sensitive. Rough or heavy stitching feels scratchy against soft skin fast. That’s exactly why light, careful stitching matters this much here.
A clean, soft design also holds up longer through washes. Means the item stays cute and comfy for a good long while.
Final Thoughts
Stitching an elephant design onto baby clothing takes a bit of care, but it’s really not hard. Pick a light design, use soft materials, and always test first.
Take your time through each step, don’t rush it. A little patience gets you a soft, clean design that looks great and feels gentle on baby skin.
If you want to check out more animal-themed patterns, look into embroidery designs as well.