



A plain cap is a blank canvas, and a patch is often the fastest way to turn it into something that actually says who you are. Whether you’re outfitting a small team, building a brand, or just personalizing your own gear, the choices around a patches hat project can feel more complicated than they should be. This guide walks through the practical decisions — style, material, size, and application — so you end up with a patch that looks sharp on day one and still looks sharp a year later.
1. Start With the Look You Want
Before you touch material samples or pricing sheets, decide on the visual direction. This single decision shapes almost everything that follows.
a) Clean and Modern
Flat embroidery with simple lines and a limited color palette reads as modern and professional. It’s the safest choice for brand logos, team gear, or anything meant to look polished in a photo.
b) Bold and Textured
Raised embroidery, chenille lettering, or thick borders create a patch that has real physical presence. These styles photograph well and hold up under heavy handling, which makes them popular for varsity-style or letterman-inspired designs.
c) Worn-In and Retro
Muted thread colors, slightly frayed edges, and vintage color schemes give a patch the look of something that’s been around for decades, even when it’s brand new. This style works well for heritage brands or nostalgic product lines.
2. Match the Patch to the Hat
Not every patch style works on every hat, and getting this wrong is one of the most common mistakes.
a) Structured Caps
Six-panel structured caps have a firm, flat front panel that shows off detailed embroidery clearly. This is the easiest surface to work with and forgives larger or more intricate designs.
b) Mesh-Back and Trucker Caps
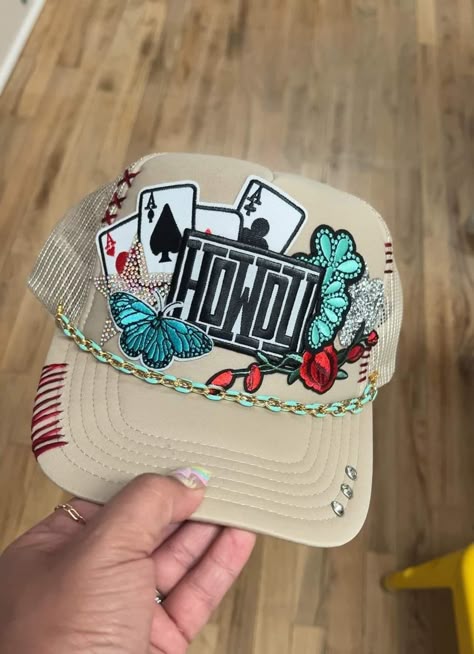
The front panel on a trucker cap is usually smaller and slightly curved, so oversized or heavily detailed patches can distort. Stick to simpler shapes and confirm the backing material will actually bond to the panel fabric you’re using.
c) Low-Profile and Dad Hats
These have a softer, less rigid front, so lightweight backing and a smaller patch size usually hold their shape better than a large, heavy patch would.
3. Understand Your Material Options
The material you choose affects durability, texture, and cost.
- Embroidered (twill or felt base): the most common choice, offering a textured, classic look with strong durability.
- Chenille: thicker and more tactile, giving letters and numbers a raised, varsity feel.
- Leather or faux leather: a clean, minimal look often used for subtle branding.
- PVC or rubber: waterproof and flexible, ideal for outdoor or heavy-use gear.
- Woven: better for fine detail and small text than standard embroidery.
4. Get the Size Right
A patch that’s sized for one hat style often looks wrong on another. As a general guide, most front-panel patches for structured and trucker caps fall somewhere between 2 and 3 inches wide, but always confirm against the actual front-panel dimensions of the hat you’re using rather than relying on a standard number. If your design will be used across multiple hat styles, it’s worth creating two or three size variations of the same artwork rather than trying to force one size to work everywhere.
5. Choose the Right Application Method
How a patch is attached matters just as much as the patch itself.
a) Iron-On
Quick and low-cost, applied with a household iron or heat press. Best for short-term use or lower-budget projects, since the bond weakens with repeated washing.
b) Sew-On
Takes longer to apply but creates the most durable, permanent bond. This is the standard choice for anything meant to last years of regular wear.
c) Hook-and-Loop (Velcro-Style)
A hook panel on the back of the patch pairs with a loop panel sewn onto the hat, letting the wearer swap patches whenever they like. This is the go-to method for interactive setups where customers or team members want to switch designs on the fly.
6. Budget With Realistic Expectations
Cost is driven mainly by three factors: patch size, number of thread colors, and order quantity. Small, simple, single-color patches ordered in bulk will always come in cheaper per unit than large, multi-color designs ordered in small batches. If you expect to reorder regularly — for a growing team, a retail line, or a recurring event — ask suppliers about tiered wholesale pricing up front, since the savings at higher quantities can be significant.
7. Vet Your Supplier Before Committing
A good supplier should be able to show you sample stitch quality, confirm realistic turnaround times, and support both custom and stock designs without vague answers. Before placing a bulk order, ask directly about:
- Minimum order quantity
- Whether free or paid samples are available
- Standard production and shipping timelines
- Their policy on reprints or quality issues
These answers tell you more about a supplier’s reliability than any product photo can.
Conclusion
Getting a patch right comes down to a handful of connected decisions: the visual style, the hat it needs to sit on, the material it’s made from, the size, how it’s applied, and the budget behind it all. Work through them in order, and you’ll avoid the most common mistake — falling in love with a design before checking whether it will actually work on the hat, wash after wash.
If you’d rather design and preview your patch before ordering, tools like a patches maker online can help you visualize colors, sizing, and layout ahead of production.