


Custom stamps are one of the most versatile and satisfying DIY tools you can create. Whether you’re adding a personal touch to packaging, decorating journals, branding your small business, or crafting handmade cards, stamps offer endless creative possibilities.
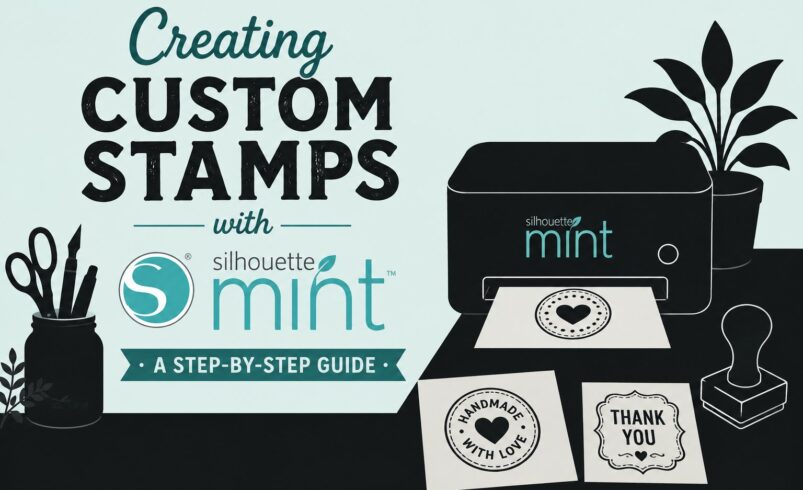
With the Silhouette Mint®, creating detailed, professional-quality custom stamps from home is easier than ever.
Unlike traditional carving methods, the Silhouette Mint uses a unique thermal printing process that allows you to transform digital designs into highly detailed stamps quickly and cleanly. Combined with Silhouette Studio®, the Mint gives creators complete control over their designs while keeping the process beginner-friendly.
If you’ve been curious about making your own stamps, this step-by-step guide will walk you through everything you need to know.
What Is the Silhouette Mint®?
The Silhouette Mint® is a specialized stamp-making machine from Silhouette America designed to create custom stamps using digital artwork.
Unlike cutting machines that use blades, the Mint uses:
-
Heat technology
-
Special stamp sheets
-
Ink-based stamping materials
This process creates stamps with impressive detail and clean impressions.
Why Creators Love the Silhouette Mint®
The Mint is popular because it allows users to:
-
Create custom branding stamps
-
Personalize crafting projects
-
Produce professional-looking designs
-
Make stamps quickly without carving
It’s especially useful for:
-
Small businesses
-
Card makers
-
Teachers
-
Journal enthusiasts
-
DIY crafters
What You Need to Get Started
Before creating your first stamp, gather the following:
Required Tools
-
Silhouette Mint® machine
-
Mint stamp kit
-
Silhouette Mint stamp sheets
-
Ink for stamping
Software
-
Silhouette Mint Studio™ or compatible Silhouette software
Optional Materials
-
Custom artwork or logos
-
Fonts and graphics
-
Decorative ink colors
Step 1: Plan Your Stamp Design
Before opening the software, think about:
-
What your stamp will be used for
-
The size of the final stamp
-
The level of detail needed
Popular Stamp Ideas
-
Business logos
-
Return address stamps
-
Teacher feedback stamps
-
Handmade tags
-
Decorative patterns
-
Planner and journal stamps
Simpler designs usually produce cleaner results for beginners.
Step 2: Create or Import Your Design
Open your Silhouette Mint software and begin designing.
You Can:
-
Create text-based designs
-
Import logos or graphics
-
Use custom fonts
-
Combine shapes and illustrations
Design Tips
-
Use bold, clear lines
-
Avoid overly tiny details
-
Keep spacing balanced
Black areas in your design become the stamp impression.
Step 3: Mirror the Design (If Needed)
For text-based stamps, your software may automatically mirror the design.
This ensures:
-
The stamp prints correctly when used
Always preview before printing to confirm orientation.
Step 4: Choose Your Stamp Size
The Silhouette Mint supports multiple stamp sizes.
Examples
-
Small planner stamps
-
Medium logo stamps
-
Larger decorative stamps
Select the correct stamp sheet size that matches your project.
Step 5: Print the Design onto Mint Material
Now it’s time to create the stamp.
How It Works
The Mint machine uses heat to transfer your design into the special stamp material.
Steps
-
Load the Mint stamp sheet
-
Send the design from the software
-
Let the machine process the material
This usually takes only a few moments.
Step 6: Assemble the Stamp
After printing:
-
Remove the stamp material carefully
-
Attach it to the stamp mount
-
Ensure alignment is straight and secure
Why This Matters
Proper assembly ensures:
-
Even stamping pressure
-
Cleaner impressions
Step 7: Apply Ink to the Stamp
The Silhouette Mint uses a unique inking system.
How to Ink
-
Add Mint ink directly onto the stamp surface
-
Allow it to absorb evenly
Popular Ink Colors
-
Black (classic business look)
-
Pastel shades for crafting
-
Bold colors for branding or décor
One inking can often produce many impressions.
Step 8: Test Your Stamp
Before using it on final projects:
-
Stamp onto scrap paper
-
Check clarity and alignment
Look For
-
Sharp edges
-
Even ink distribution
-
Proper text readability
If needed:
-
Re-ink lightly
-
Adjust pressure when stamping
Creative Ways to Use Custom Stamps
Now that your stamp is ready, here are some creative applications.
1. Small Business Branding
Custom stamps are perfect for:
-
Packaging
-
Thank-you cards
-
Shipping boxes
-
Kraft paper wrapping
Why It Works
It creates:
-
A handmade feel
-
Consistent branding
-
Affordable packaging upgrades
2. Handmade Cards & Invitations
Add:
-
Decorative borders
-
Personalized messages
-
Elegant motifs
Stamps bring texture and charm to paper crafts.
3. Journaling & Planner Decor
Planner communities love custom stamps for:
-
Habit trackers
-
Decorative accents
-
Labels and icons
4. Fabric & Textile Projects
With fabric-safe ink, you can stamp:
-
Tote bags
-
Napkins
-
Fabric tags
5. Teacher & Classroom Use
Teachers use custom stamps for:
-
Feedback marks
-
Classroom rewards
-
Educational activities
Design Tips for Better Stamp Results
1. Use High Contrast
Clear black-and-white designs work best.
2. Avoid Tiny Details
Very fine lines may lose clarity.
3. Keep Text Readable
Choose bold, legible fonts.
4. Test Before Finalizing
A quick test prevents wasted materials.
Common Beginner Mistakes
Overcomplicated Designs
Simple designs often stamp more cleanly.
Too Much Ink
Over-inking can blur details.
Uneven Pressure
Press evenly for crisp impressions.
Ignoring Size Limitations
Design with your stamp dimensions in mind.
Why Silhouette Tools Make Stamp Creation Easier
Silhouette products are designed to work together seamlessly.
With:
-
Silhouette Studio® for customization
-
Silhouette Mint® for stamp production
-
Access to fonts and graphics from Silhouette resources
You can move from idea to finished stamp quickly and easily.
Turning Stamp Making Into a Business Opportunity
Custom stamps are also highly sellable.
Popular Business Niches
-
Wedding stamps
-
Branding kits
-
Teacher stamps
-
Planner accessories
With the Mint, creators can:
-
Offer personalized products
-
Produce small batches efficiently
-
Expand into stationery and branding markets
Why Custom Stamps Are Trending in 2026
In a digital world, handmade details stand out more than ever.
Custom stamps add:
-
Texture
-
Personality
-
Authenticity
They help creators and businesses:
-
Feel more personal
-
Build stronger branding
-
Create memorable experiences
Final Thoughts: Bring Your Designs to Life with Silhouette Mint®
Creating custom stamps with the Silhouette Mint® is one of the easiest and most rewarding ways to turn digital creativity into something tangible.
Whether you’re:
-
Personalizing gifts
-
Building a business brand
-
Exploring paper crafts
-
Creating planner accessories
The Mint gives you the power to design something uniquely yours.
And once you make your first custom stamp, you’ll quickly realize:
The possibilities are almost endless.